Purchase Invoices
Purchase Invoices are bills that your supplier sends you when you make a purchase.
It is a transactional entry that denotes a purchase.
Creating Purchase Invoices
To create a Purchase Invoice, first navigate to the Purchase Invoices page
Purchases > Purchase Invoices
Then click on the + button to open the Purchase Invoice form.
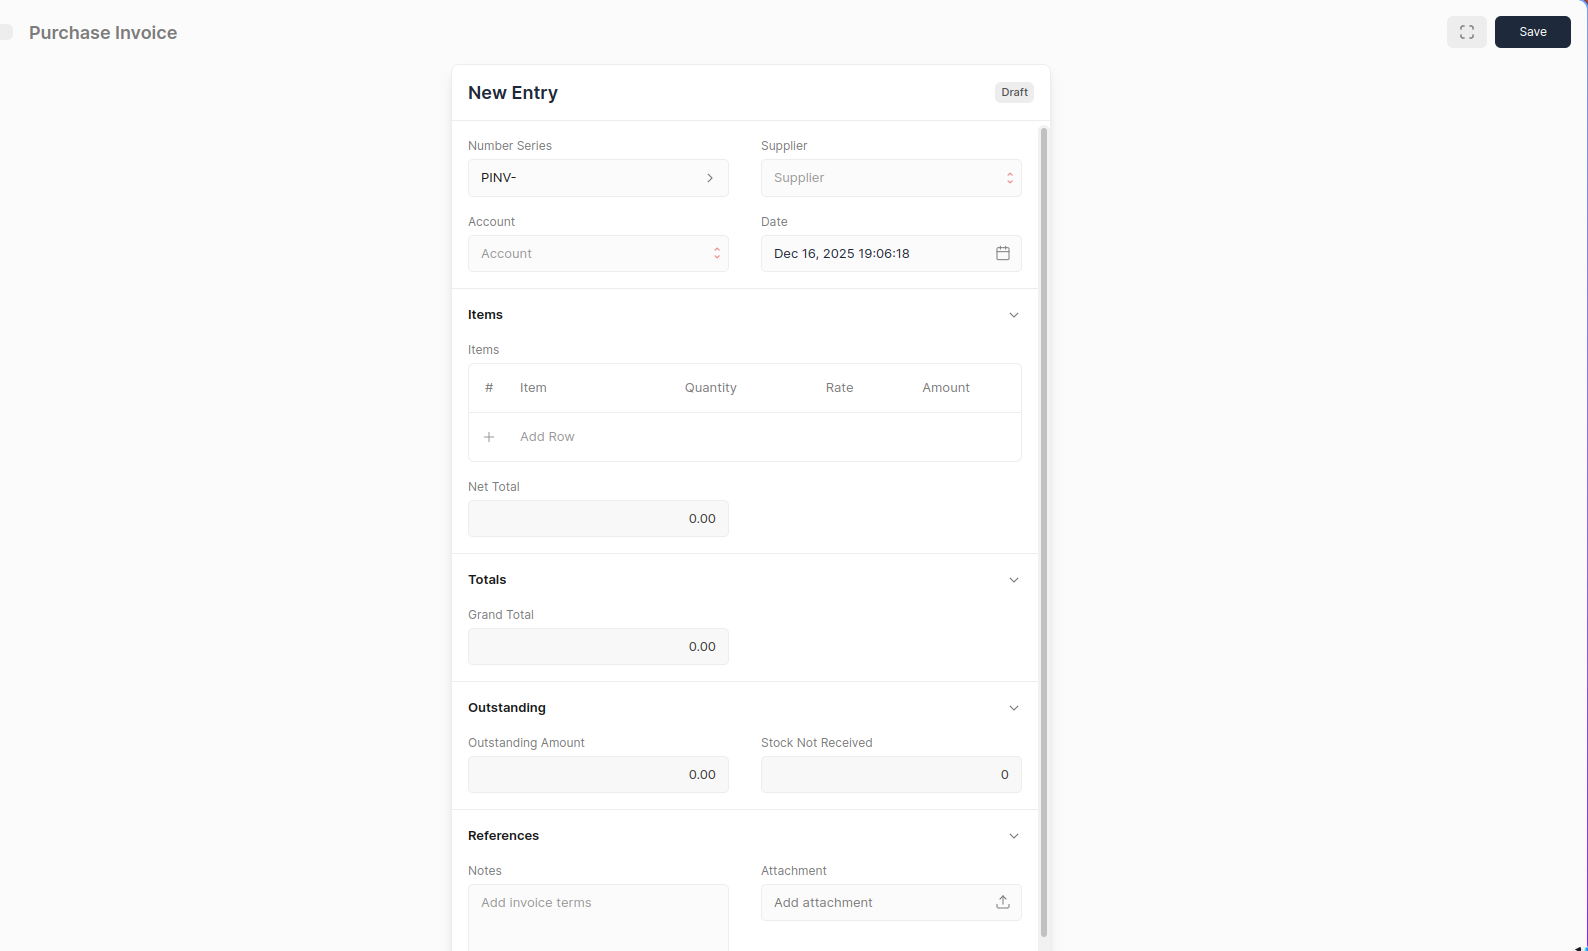
- Select the Supplier from whom you will be making a purchase.
- Click on Add Row and select the Item being purchased.
- Enter the Quantity.
- You can add more items or if you are done, click on Save.
- Once finalized, click on Submit. Accountinite will do the required ledger entries against the appropriate accounts.
Making Purchase Payments
Once a purchase invoice has been submitted, you’ll need to record payment against it to denote that you’ve paid the money.
To make a Payment first navigate to the Purchase Payments section, then click on the + button. This will open the Payment quick edit form with the outstanding amount auto-filled.
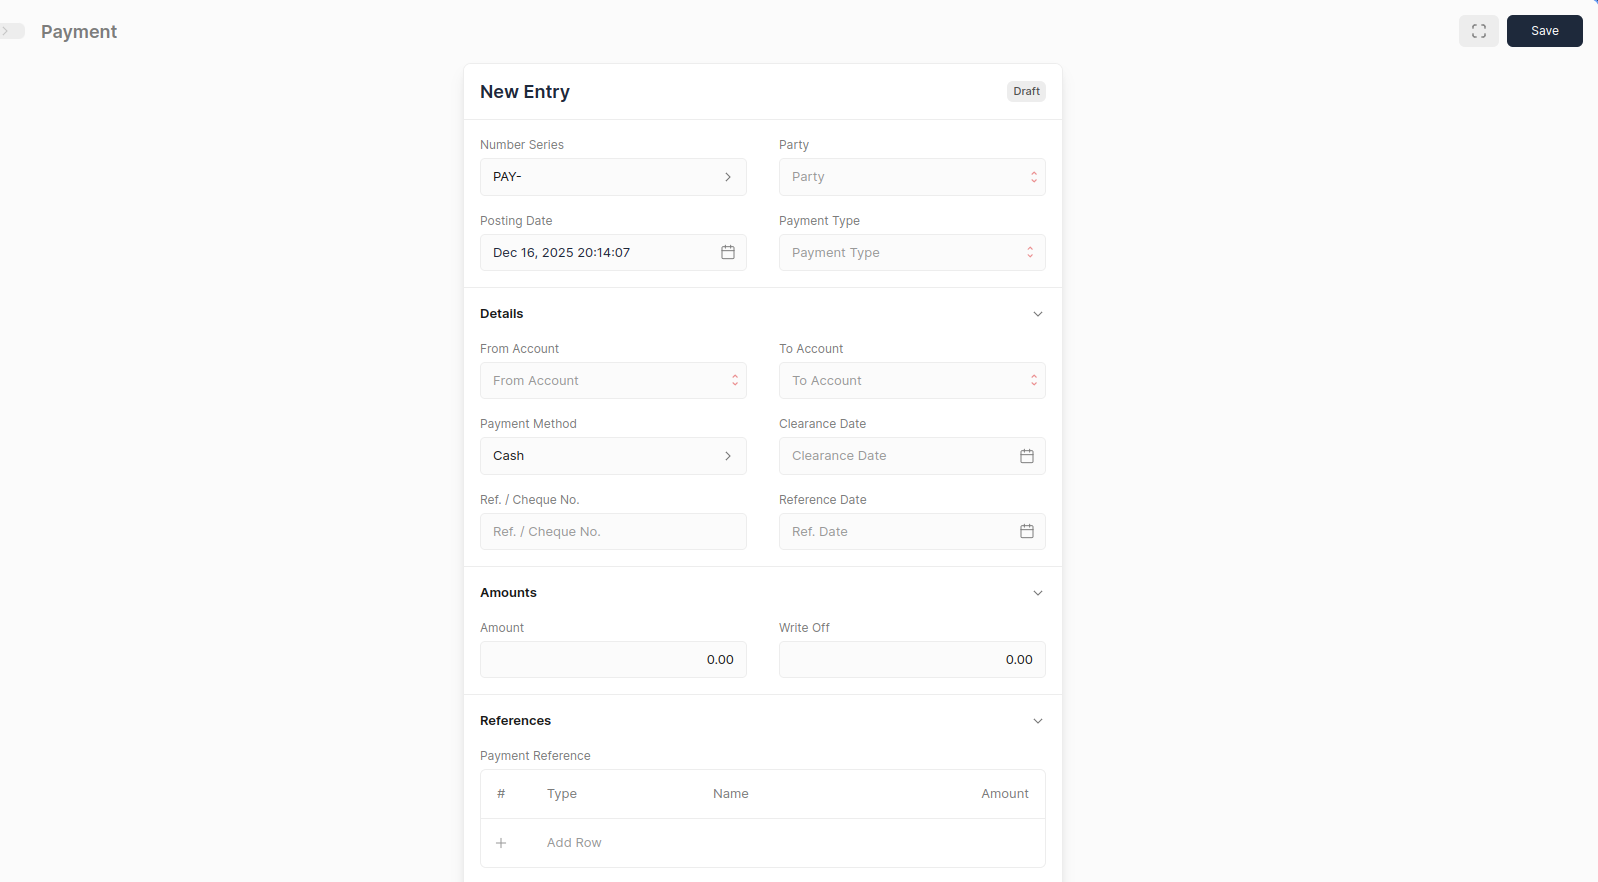
Once done fillign the values, click on Save. This will Save and Submit the Payment.
On making the Payment, Accountinite will make the necessary ledger entries to increase the payment amount in Accounts Payable and decrease the amount in your Bank or Cash Account.
It will also update the Outstanding Amount on the invoice form.
Auto Payments
You can simplify the Purchase Invoice → Payment workflow by using Auto Payments. For this you just need to set the default accounts for Purchase Payment.
This can be done in Setup > Settings > Defaults > Auto Payments: 
Once this is set, whenever you Submit a Purchase Invoice a Payment entry will automatically be created.
Disable Auto Payment for a Purchase Invoice
You can disable Auto Payment by simply deleting the payment account from Defaults Settings, then saving the changes.
Purchase Invoice Return
- Navigate to the Purchase Invoice page
Purchases > Purchase Invoice - Click on Return Against then select the target Purchase Invoice against which you returned the Items.
- Fill Item details.
- Save and Submit.
Purchase Invoice impact on General Ledger
The Purchase Invoice Return entry will create General Ledger entries to reverse the impact of the original Purchase Invoice.